
Bezalel 1.1: a PHP CMS for blogs, magazines, online stores and company websites (live preview, download and install guide)
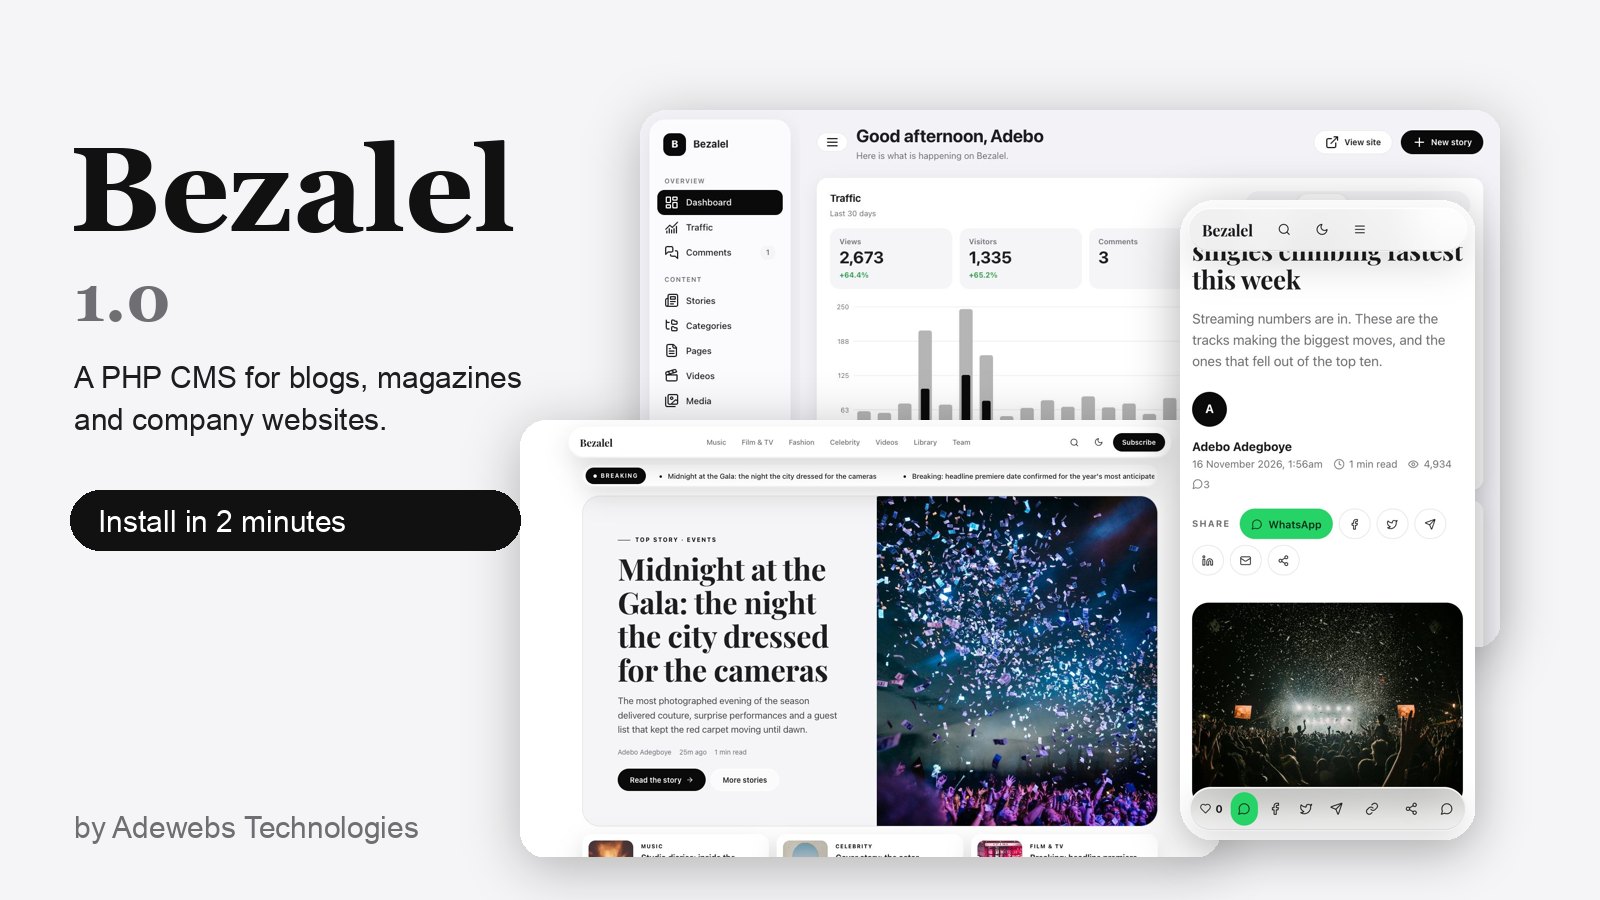
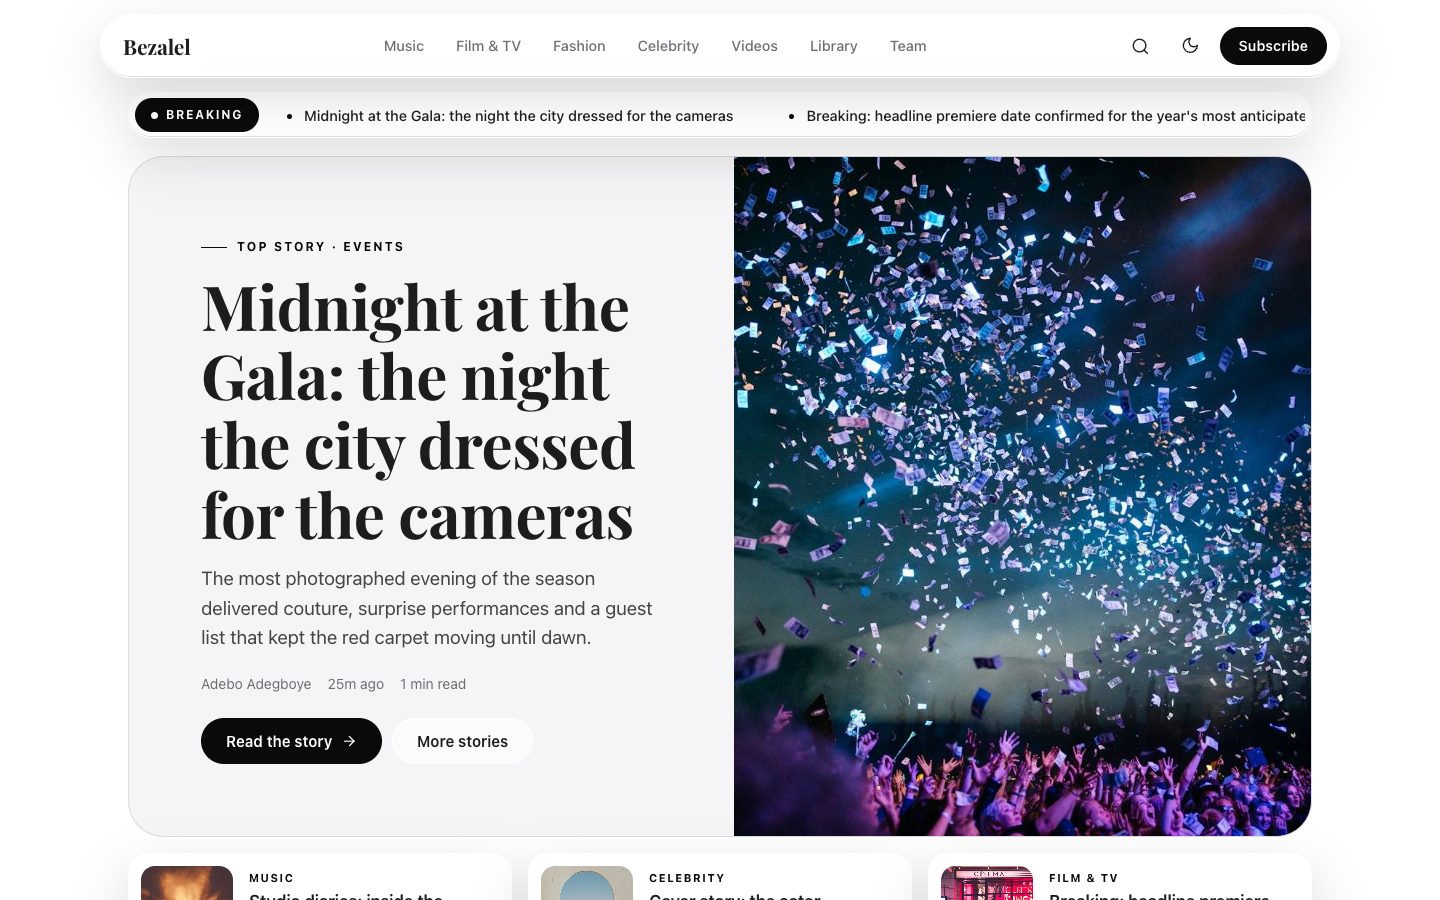
Bezalel is a lightweight PHP content management system built by Adewebs Technologies. One script runs a luxury entertainment blog, a tech magazine, a travel and lifestyle journal, a full company website, or a complete online store. It installs on ordinary shared hosting in a couple of minutes, writes its own database, and gives you an editor, SEO tools, traffic statistics, comments, sharing and a shop for physical goods, services and digital downloads.
Version 1.1 adds two ready-made store themes, a WordPress and WooCommerce importer, one-click signed updates, ad and analytics connections, email notifications and a built-in security layer. This guide shows what it does, lets you try it live, and walks you through downloading it from our server and installing it, step by step.
Try the live preview Switch between all the themes with the "Try another theme" button, and open the read-only admin to look around.
Why we built Bezalel
For well over a decade, WordPress has carried the web. It has served countless companies, publishers and shops, in Africa and far beyond, and it deserves real respect for that.
But look at where the tools we rely on come from. Almost all of them were designed somewhere else, for someone else, and shipped to us. We have adapted, patched and worked around them for years. We have made them work, but they were not made with us in mind.
Our terrain is different. Many of our customers browse on phones and on slow, expensive data. Many businesses run on affordable shared hosting. WhatsApp is how stories travel, and how customers talk to the people they buy from. Payments run through Paystack, Flutterwave and IdentifyOrg, not only the gateways that Western tools take for granted. Sellers need to take orders and collect payment in naira, with cash on delivery and bank transfer as ordinary options, not afterthoughts.
At Adewebs Technologies, one of our core beliefs is that we should always build with Africa in mind. Nobody can tell our stories like we can, and nobody understands our terrain well enough to build for it like we do. So instead of waiting for the next imported tool to fit us a little better, we built our own.
Bezalel is a content management system made in Africa, for African businesses, and for anyone who wants a fast, honest, easy-to-own website. It installs on the hosting you can already afford, loads quickly on a phone, puts WhatsApp sharing first, and connects to the payment providers our customers actually use. It is ours, so we keep improving it for the people who use it.
This is only the beginning. If you build, publish or sell from Africa, we would love you to try it, tell us what is missing, and help shape what comes next.
What you get
- A WordPress-style editor with headings, quotes, links, images and video (YouTube, Vimeo or files on your own server), drafts and scheduling.
- Yoast-style SEO checks for the focus keyphrase, title, meta description and readability, plus a Google preview. Every page also ships with canonical links, social cards, structured data, a sitemap, a Google News sitemap and an RSS feed.
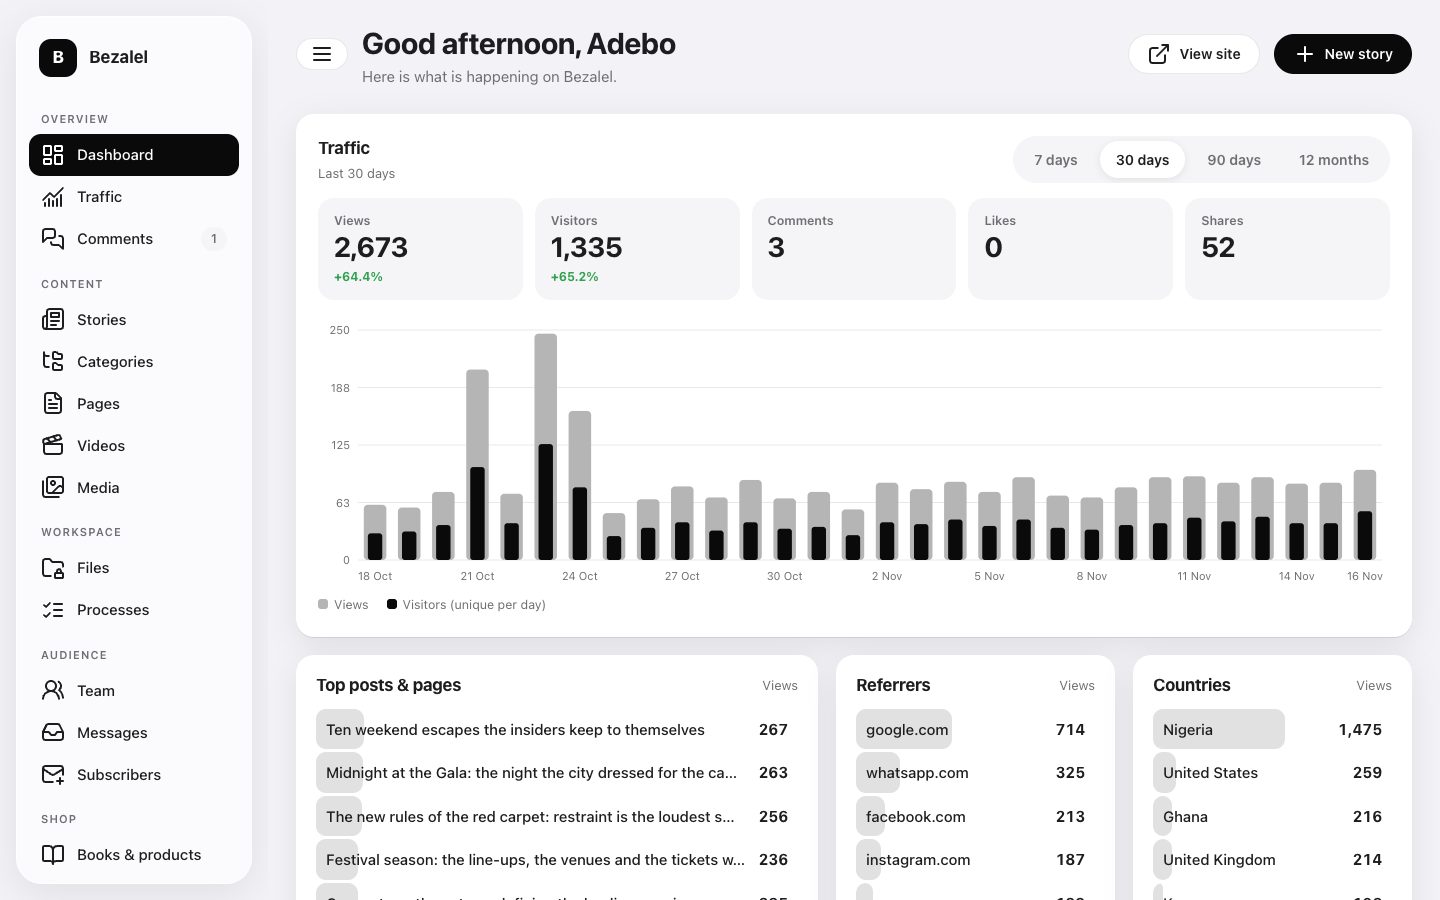
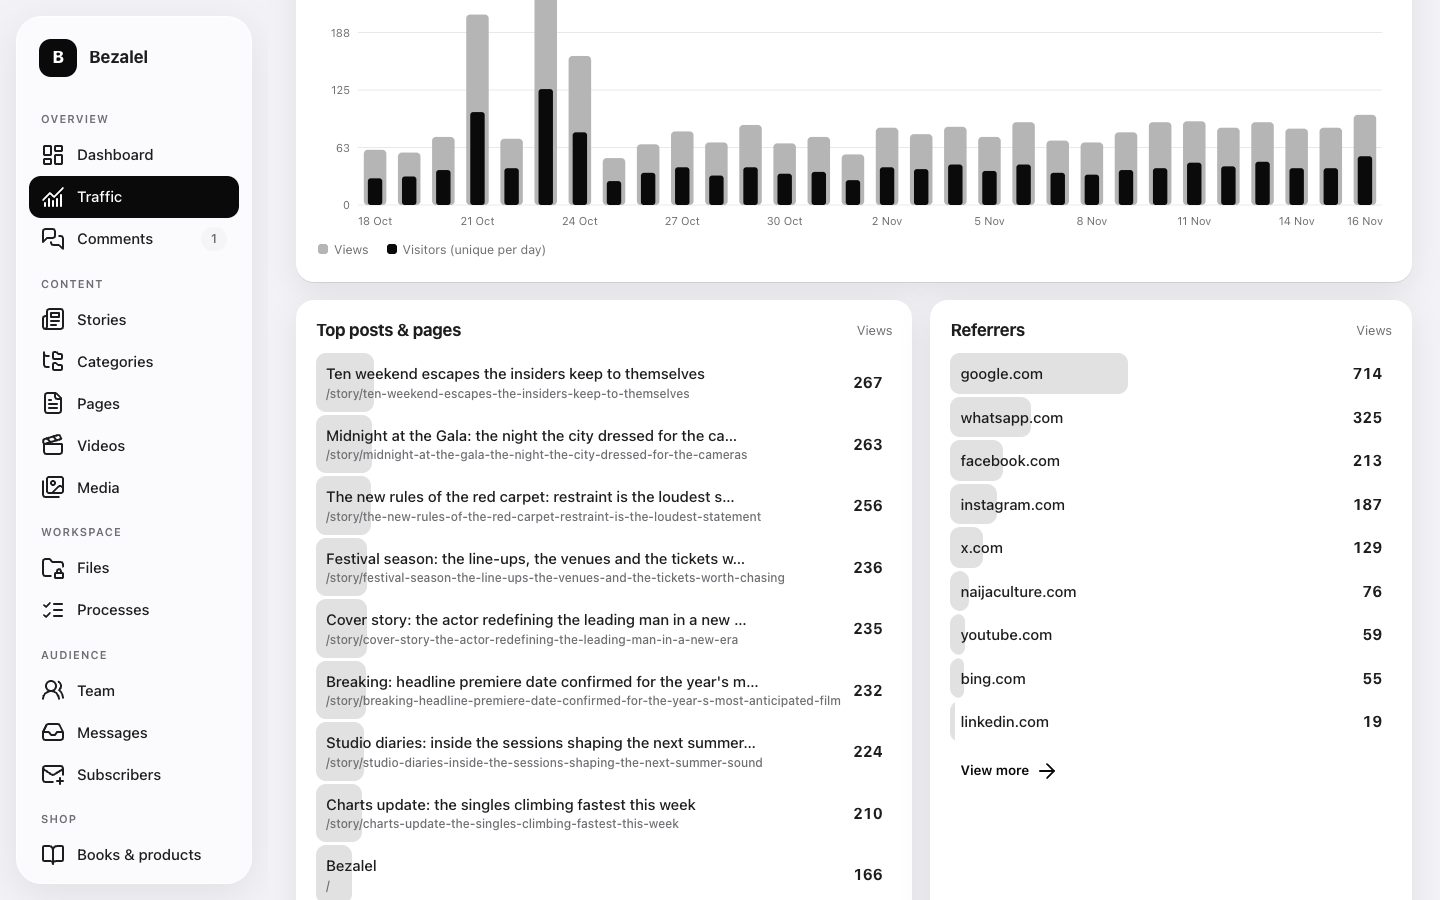
- Traffic statistics without cookies or third parties: views, visitors, countries, referrers, search keywords, devices and share clicks, with filters and CSV export.
- Comments and likes with nested replies, moderation and spam checks.
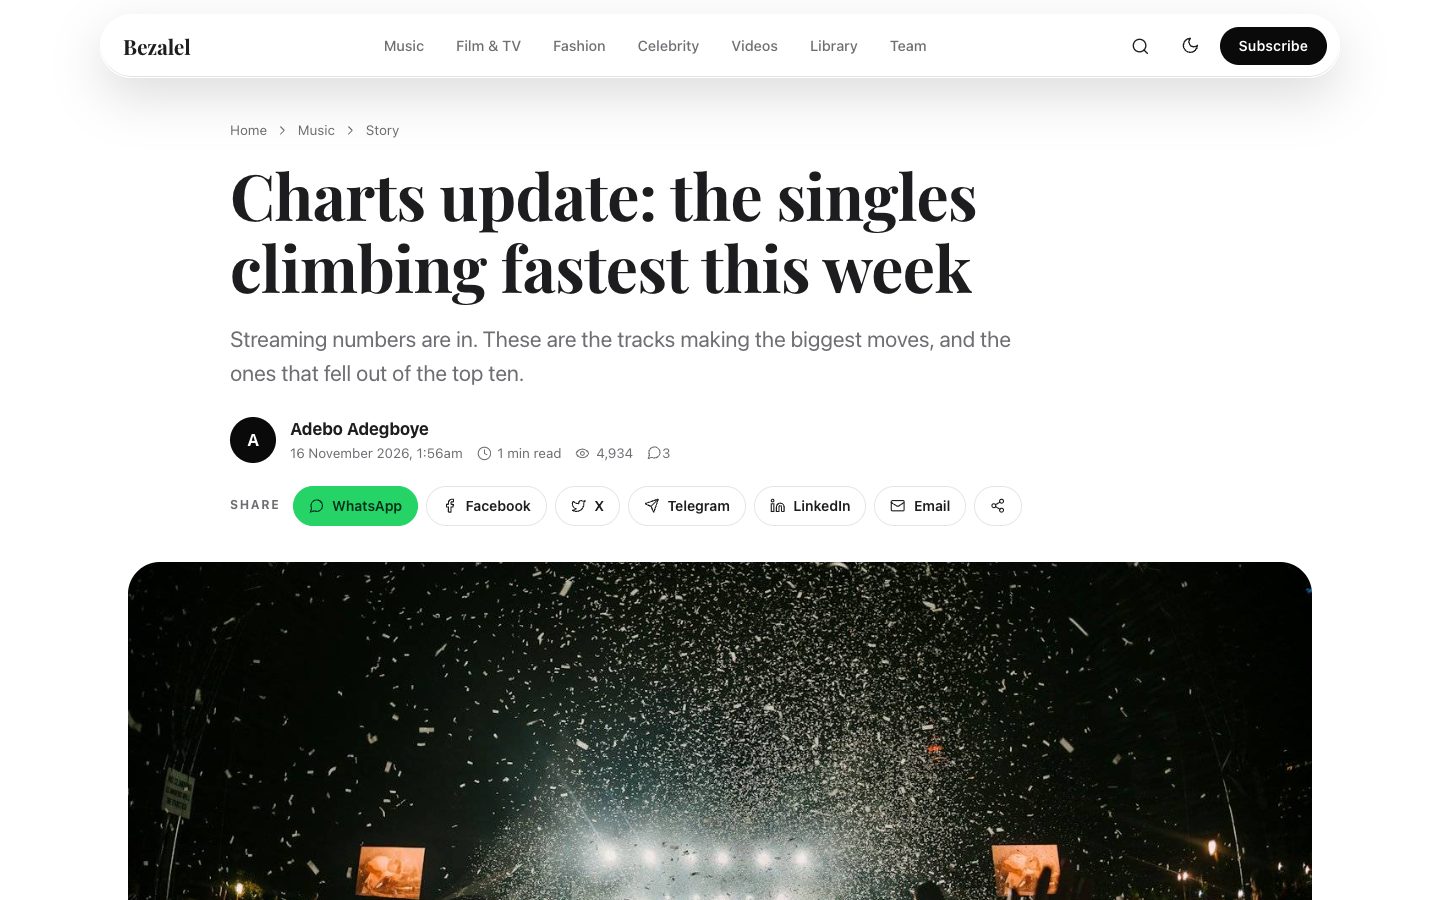
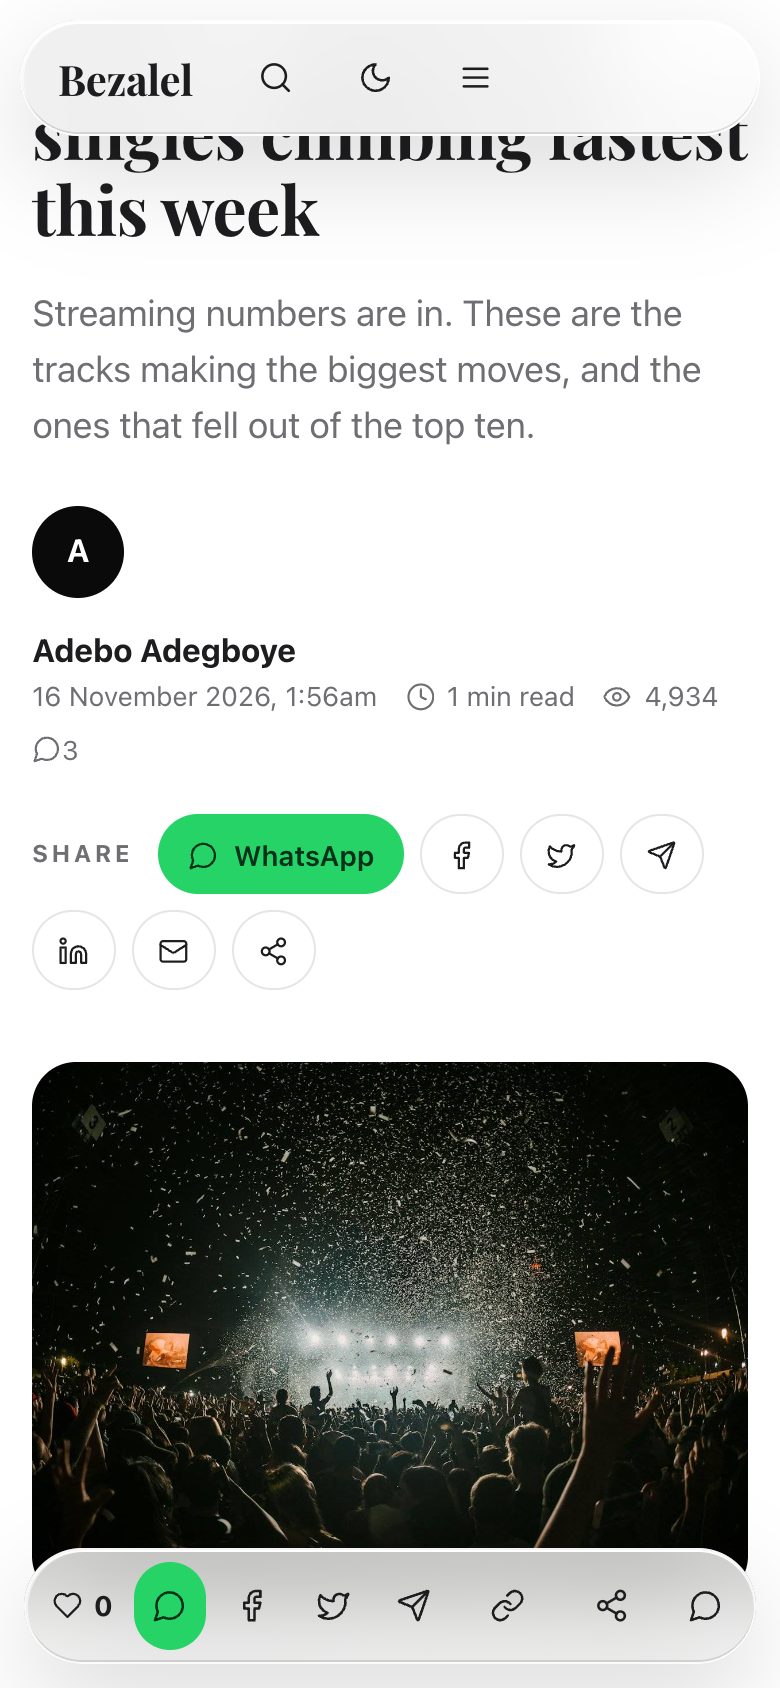
- Sharing to WhatsApp, Facebook, X, Telegram, LinkedIn and more, with a sticky share bar on phones.
- A full online store: physical goods, services and downloads with categories, sizes, colours, variants, stock, coupons, delivery methods, reviews and customer accounts, paid through IdentifyOrg (on by default), Paystack, Flutterwave, bank transfer or cash on delivery.
- Thirteen themes, including complete designs for tech blogs, lifestyle sites, company websites and two online stores, with editable text, colours, fonts and images.
- WordPress migration that keeps your posts, pages, comments, images and Google rankings.
- Ads and analytics: Google Analytics, AdSense and other networks, with places to put your own code.
- Email notifications through your own Gmail or SMTP account, and automatic attack blocking with optional two-step sign-in.
- Your own HTML pages: paste any design into a page and edit it freely.
Step-by-step: download and install Bezalel
Before you start
You need web hosting (shared hosting, a VPS or a dedicated server) with PHP 8.1 or newer. Almost every host already has the PHP extensions Bezalel uses: SQLite or MySQL, cURL, fileinfo, mbstring and DOM. The installer checks all of this for you and tells you what to fix. If your host lets you choose the PHP version (in cPanel it is called Select PHP Version or MultiPHP Manager), pick 8.1 or higher for your domain first.
Step 1. Download the package
Download Bezalel 1.1 (11.0 MB)
The file is bezalel-1.1.zip, stored on our server at https://api.adewebstech.ng/media/downloads/bezalel-1.1.zip. To confirm your download is complete and untouched, its SHA-256 fingerprint is:
65d538dfdab511d5a7310400e1733acaa86930dc40a38fc88721835a1317655fOn a Mac or Linux computer you can check it with shasum -a 256 bezalel-1.1.zip. On Windows use certutil -hashfile bezalel-1.1.zip SHA256.
Step 2. Upload it to your hosting
Choose whichever suits you:
- cPanel File Manager (easiest). Log in to cPanel and open File Manager. Go into the folder of your website (usually
public_html; for a sub-folder such asyourdomain.com/blog, create that folder and open it). Click Upload, choosebezalel-1.1.zip, wait for it to finish, then right-click the file and choose Extract. - FTP (FileZilla or similar). Extract the zip on your computer, then upload everything inside the
bezalelfolder to your website folder. Remember the hidden file.htaccessmust be uploaded too. - SSH on a VPS or dedicated server. Run these commands inside your site folder:
wget https://api.adewebstech.ng/media/downloads/bezalel-1.1.zip
unzip bezalel-1.1.zip
cp -a bezalel/. . && rm -rf bezalel bezalel-1.1.zip
After extracting, make sure the files are directly in your site folder (you should see index.php, .htaccess and the folders app, install, themes, uploads, data and storage there), not inside an extra bezalel folder. If they are, select everything inside it and move it up one level.
Step 3. Check folder permissions
Bezalel must be able to write to three folders: data, uploads and storage. On most hosts this already works. If the installer later reports a folder is not writable, set its permission to 755 (or 775) in File Manager by right-clicking the folder and choosing Change Permissions.
Step 4. Open the installer
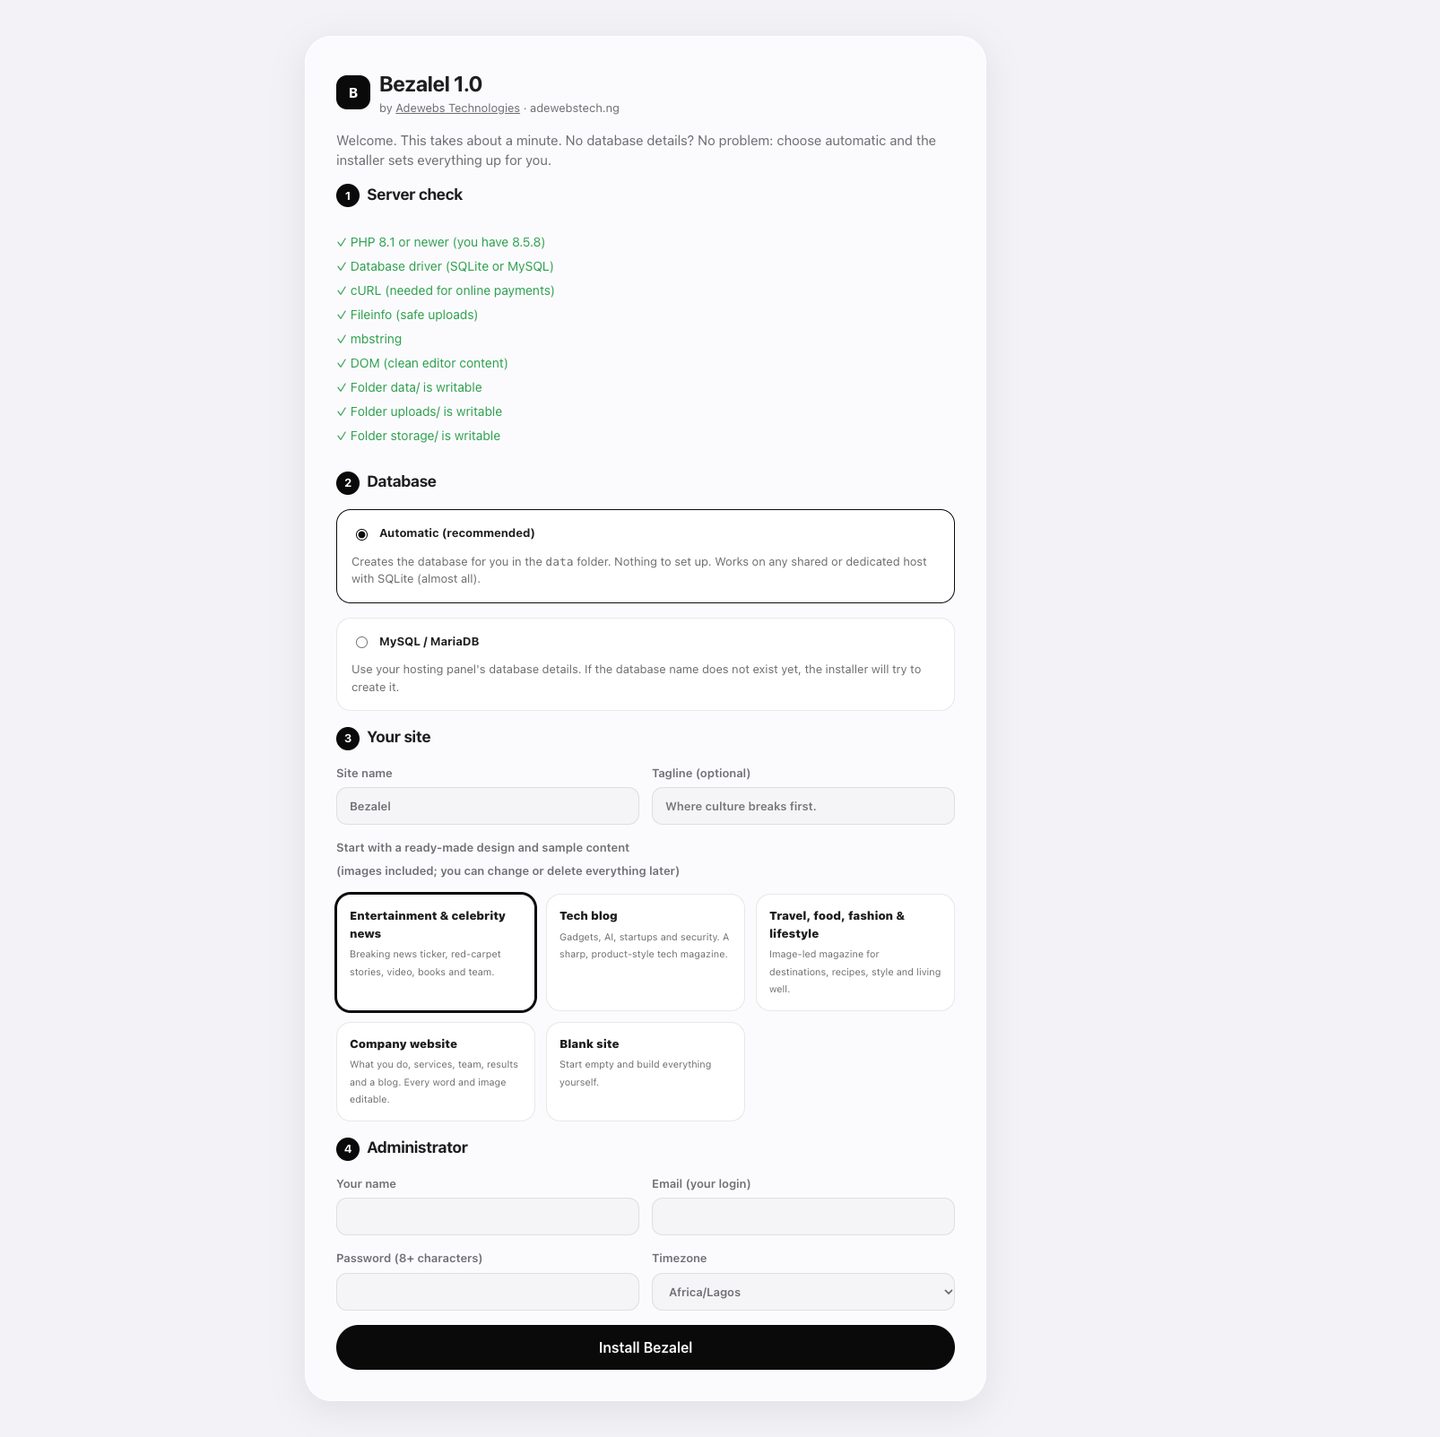
In your browser, go to https://yourdomain.com/install/. You will see the Bezalel installer with a server check: a list of ticks. Everything should be green. If something is red, the installer tells you how to fix it. Fix it, refresh the page, and continue.
Step 5. Choose your database
- Automatic (recommended). Pick this if you do not have, or do not want to set up, a database. Bezalel creates its own SQLite database inside the
datafolder. There is nothing else to configure. - MySQL / MariaDB. Enter the database name, user, password and host from your hosting panel (the host is usually
localhost). If the database does not exist yet, the installer tries to create it for you. Some shared hosts do not allow that. In that case create an empty database in cPanel under MySQL Databases, add your database user to it with all privileges, and enter those details.
Step 6. Name your site and pick a design
Enter your site name (it is filled in as Bezalel; change it to yours) and an optional tagline. Then choose a starting design. Each one comes with sample stories, pages, team members and photos so your site never looks empty. You can edit or delete all of it later:
- Entertainment and celebrity news: breaking ticker, red-carpet stories, video and books.
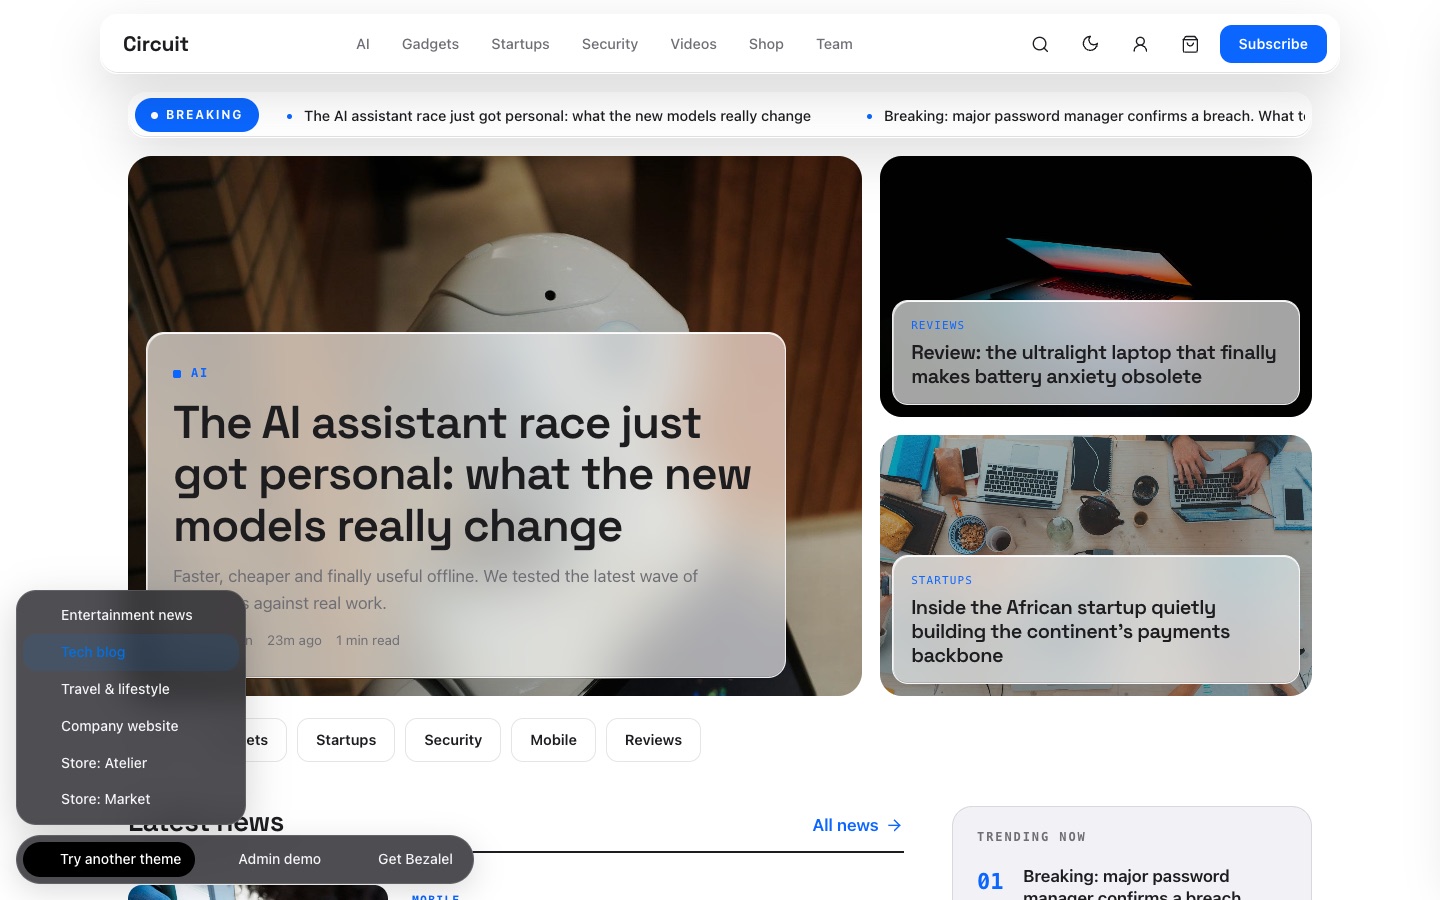
- Tech blog: the Circuit design for gadgets, AI, startups and security.
- Travel, food, fashion and lifestyle: the Wanderlust design.
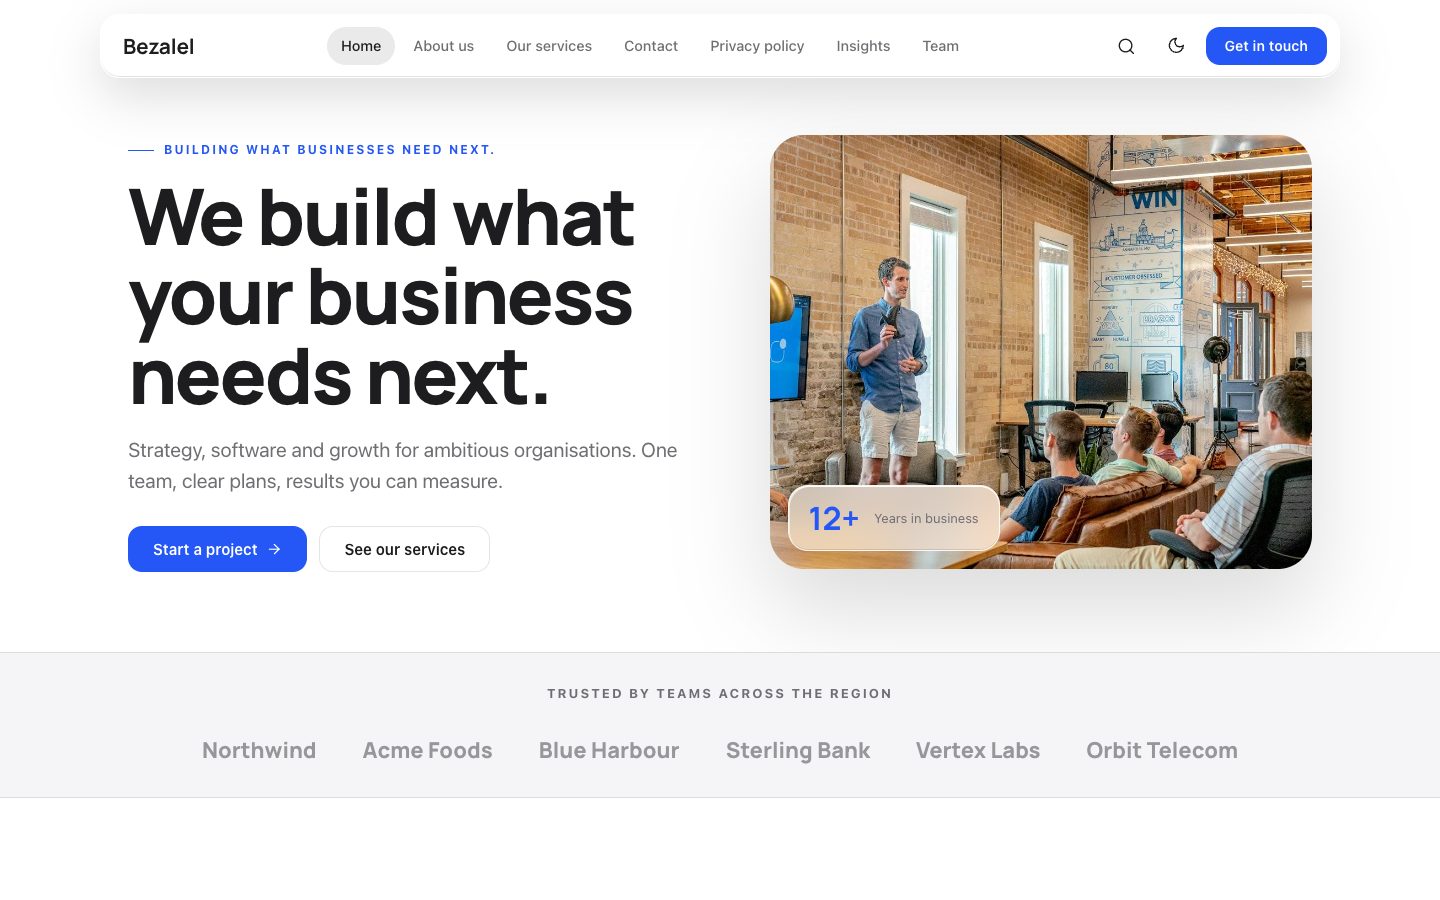
- Company website: the Corporate design with services, team and testimonials.
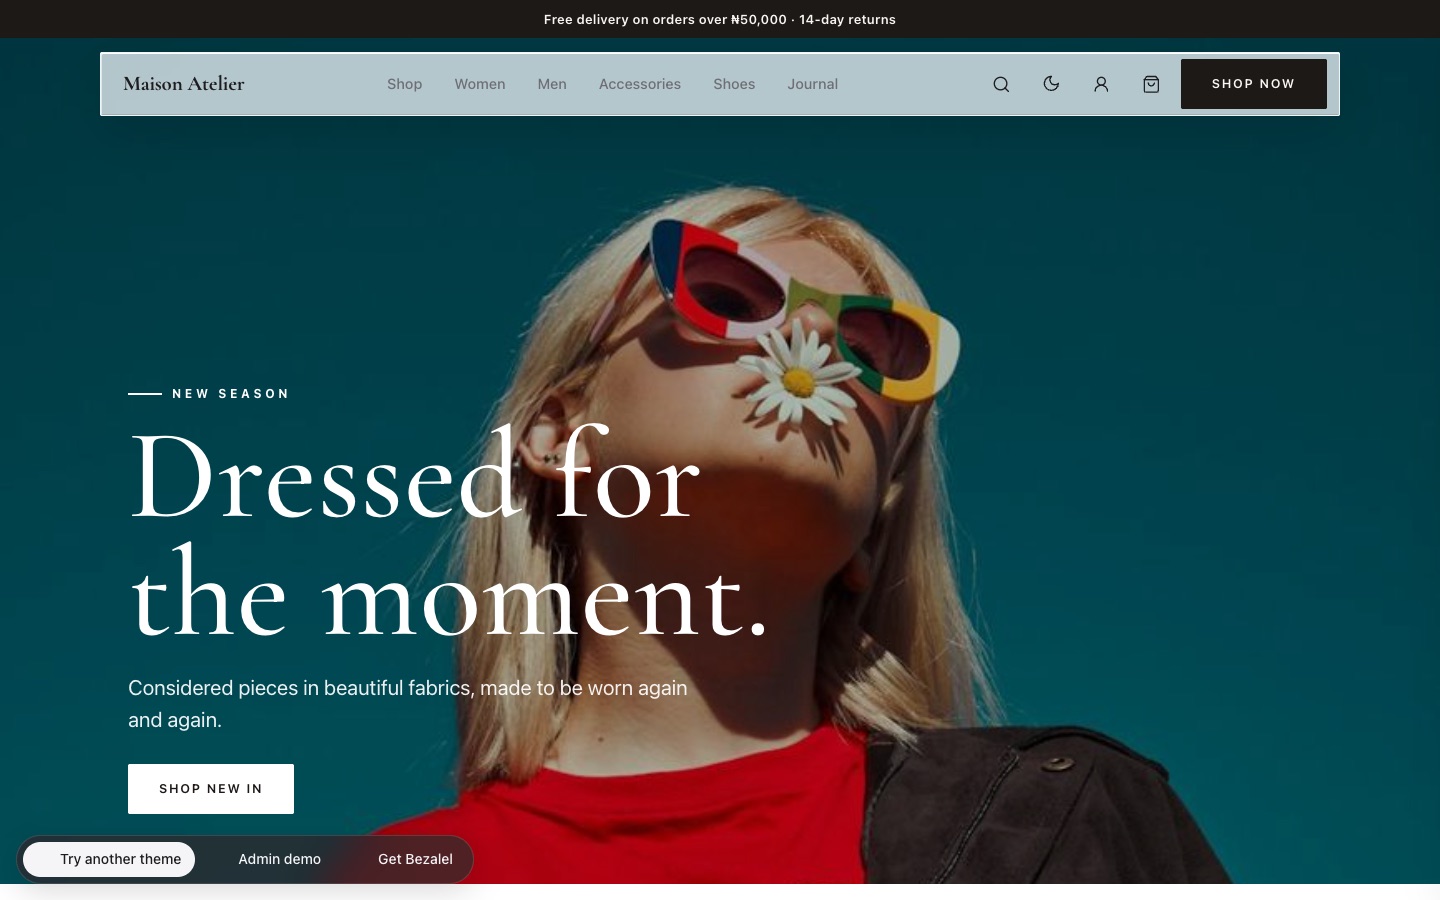
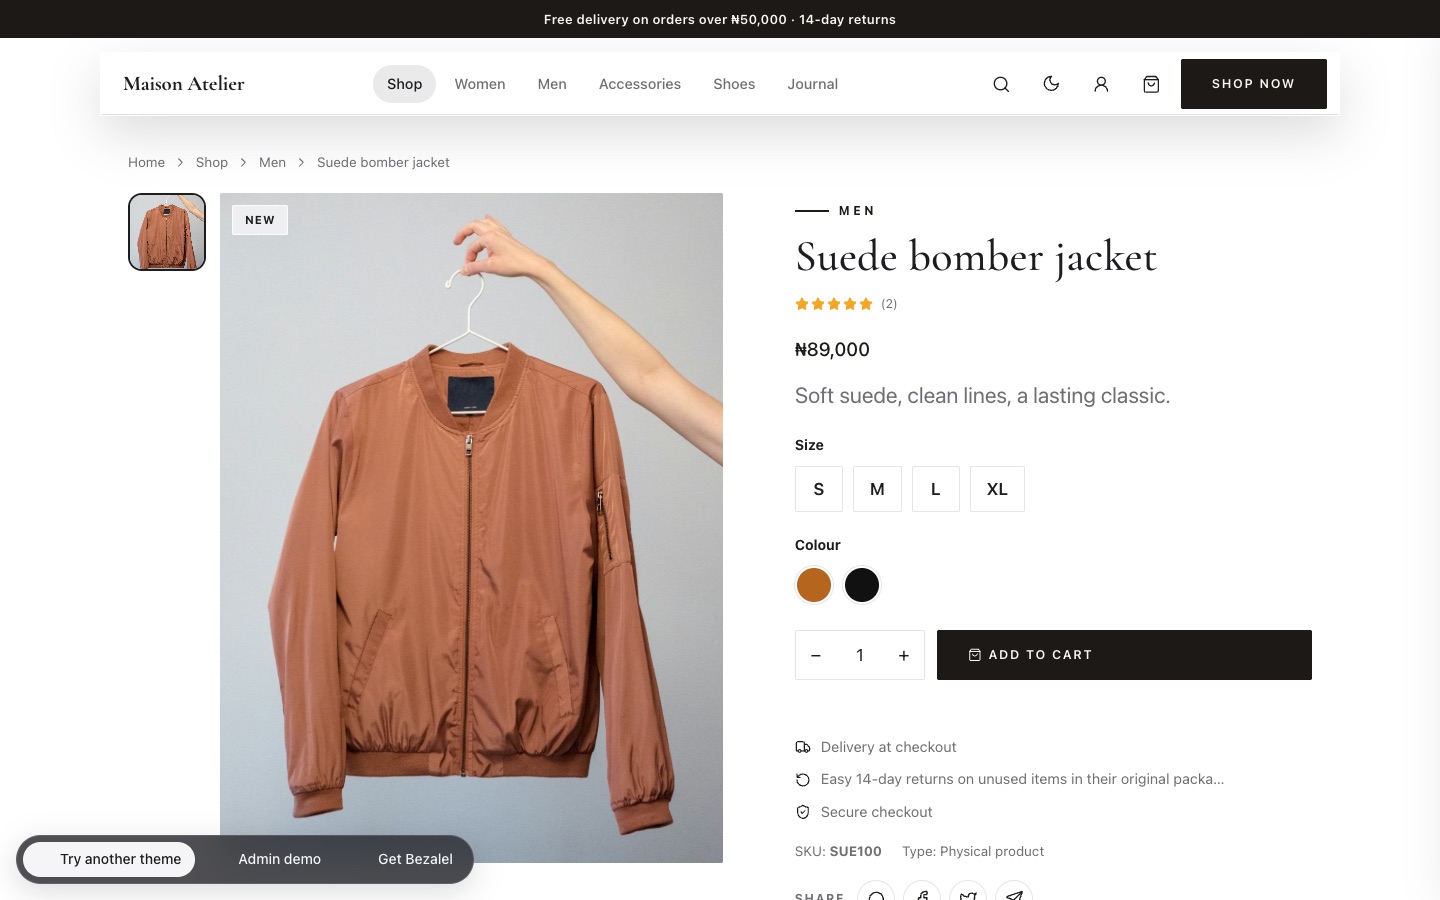
- Online store: fashion boutique: the Atelier design with 20 sample products, sizes and colours.
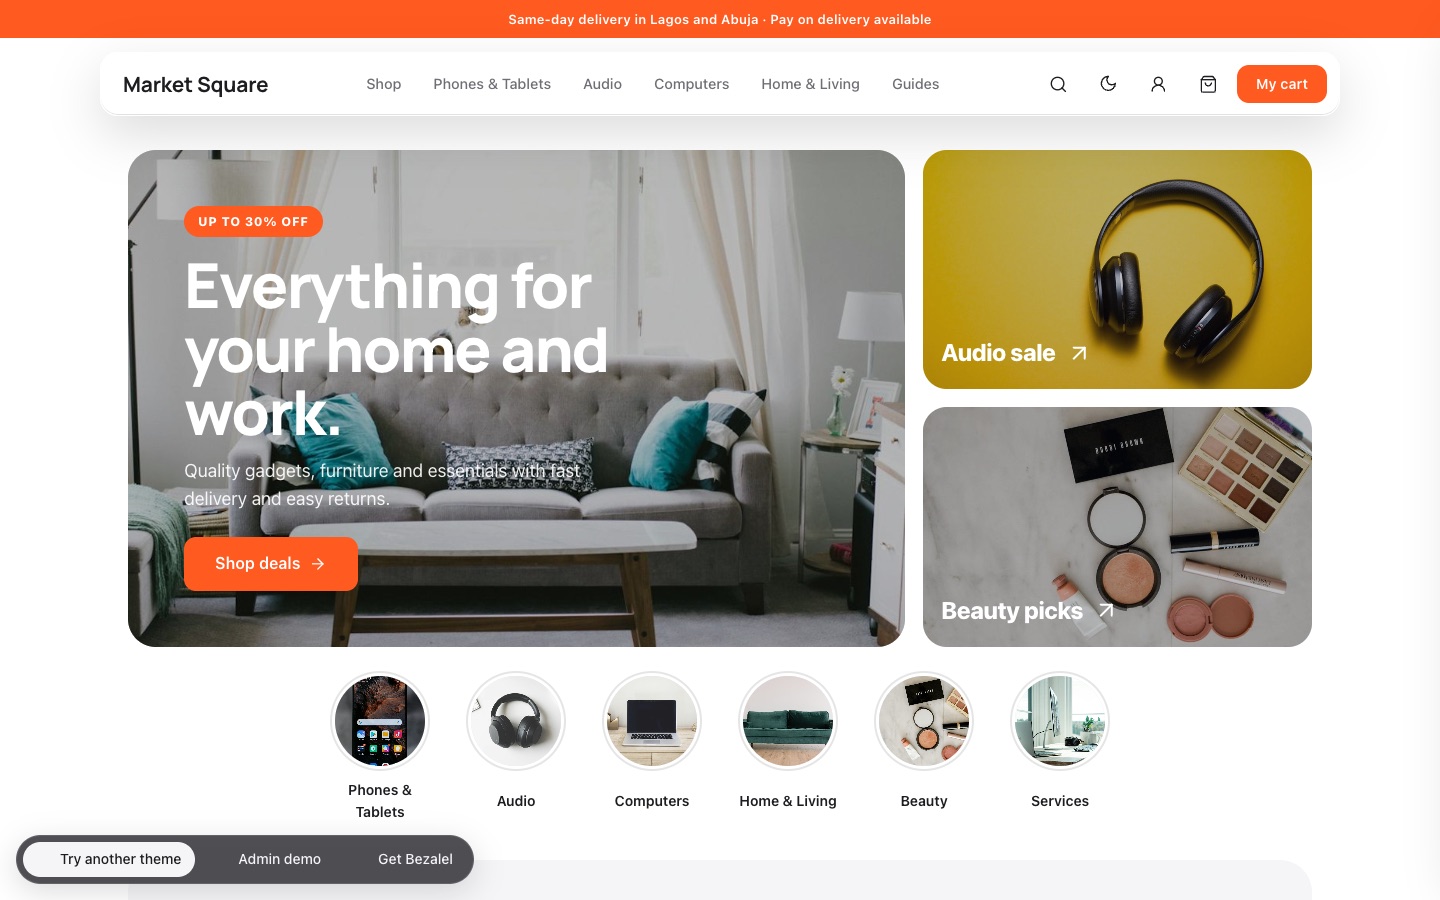
- Online store: marketplace: the Market design for goods, services and downloads, with deals and filters.
- Blank site: start from nothing.
Step 7. Create your administrator account
Enter your name, your email address (this is your login) and a password of at least 8 characters, choose your timezone, then press Install Bezalel. Near the button there is one optional tick box that lets us email you about important security and update notices; it is off unless you tick it. Within a few seconds you will see Your site is ready with your admin login details.
Step 8. Delete the install folder
This step is important. Leaving the installer on your server is a security risk. On the final screen press Delete the install folder for me. If that button cannot remove it on your host, delete the install folder yourself with File Manager or FTP. Until it is gone, the admin dashboard keeps showing a warning with the same delete button.
Step 9. Sign in and make it yours
Open https://yourdomain.com/admin and sign in. Then work through this short list:
- Settings > Logo & branding: upload your logo, favicon and default share image.
- Settings > Address & contact and Social: add your address, phone, email, WhatsApp number and social links. They appear across every page.
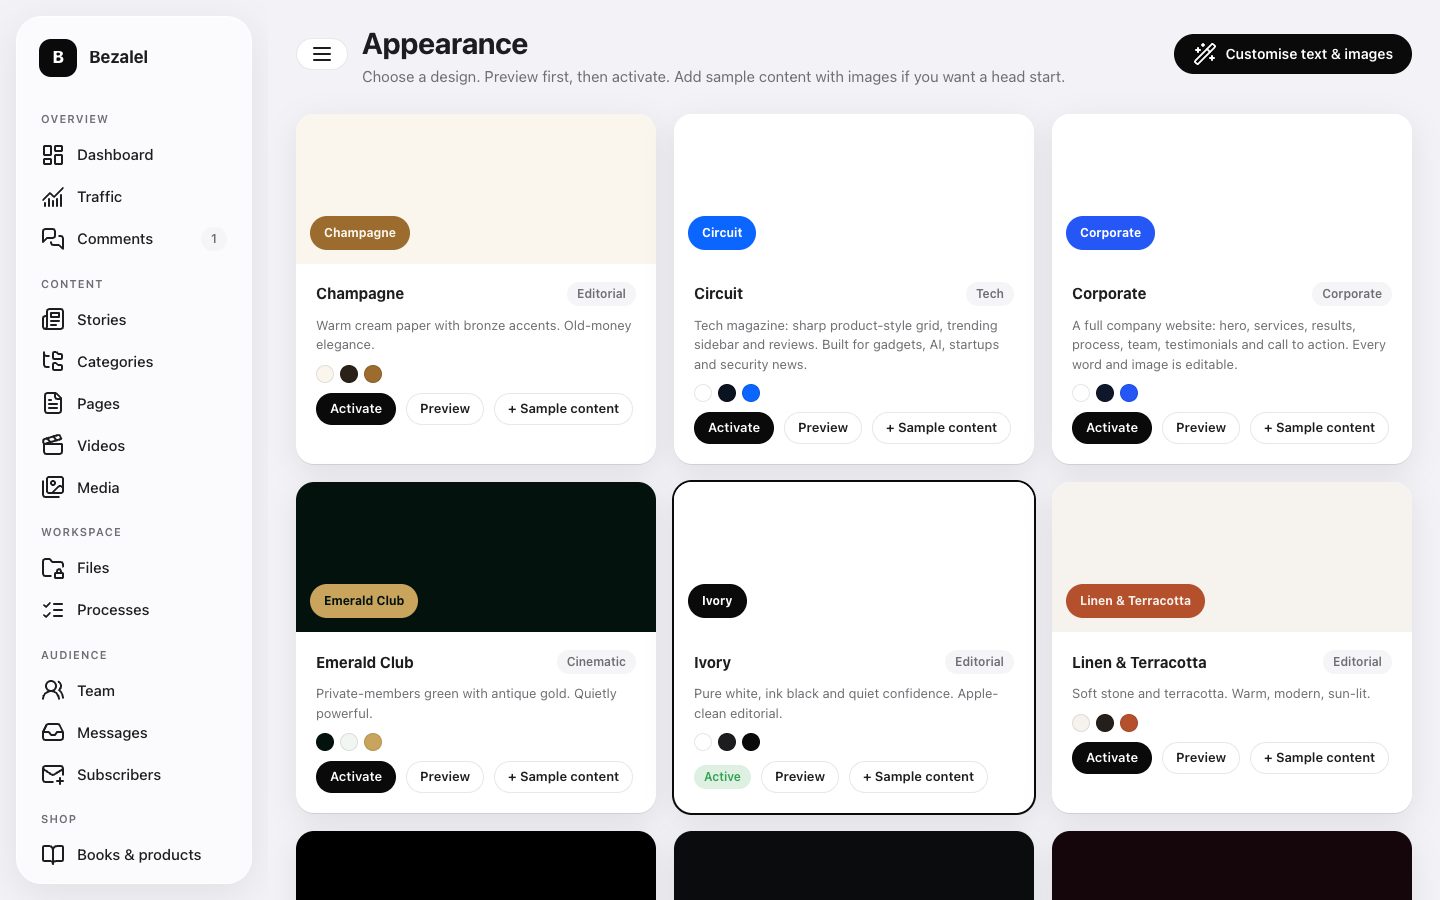
- Appearance: preview and activate a theme, choose your brand colour, light and dark backgrounds, and heading font. The + Sample content button adds a theme's sample content at any time.
- Customise theme: change every headline, tagline, service, testimonial and image the theme uses.
Step 10. Publish your first story
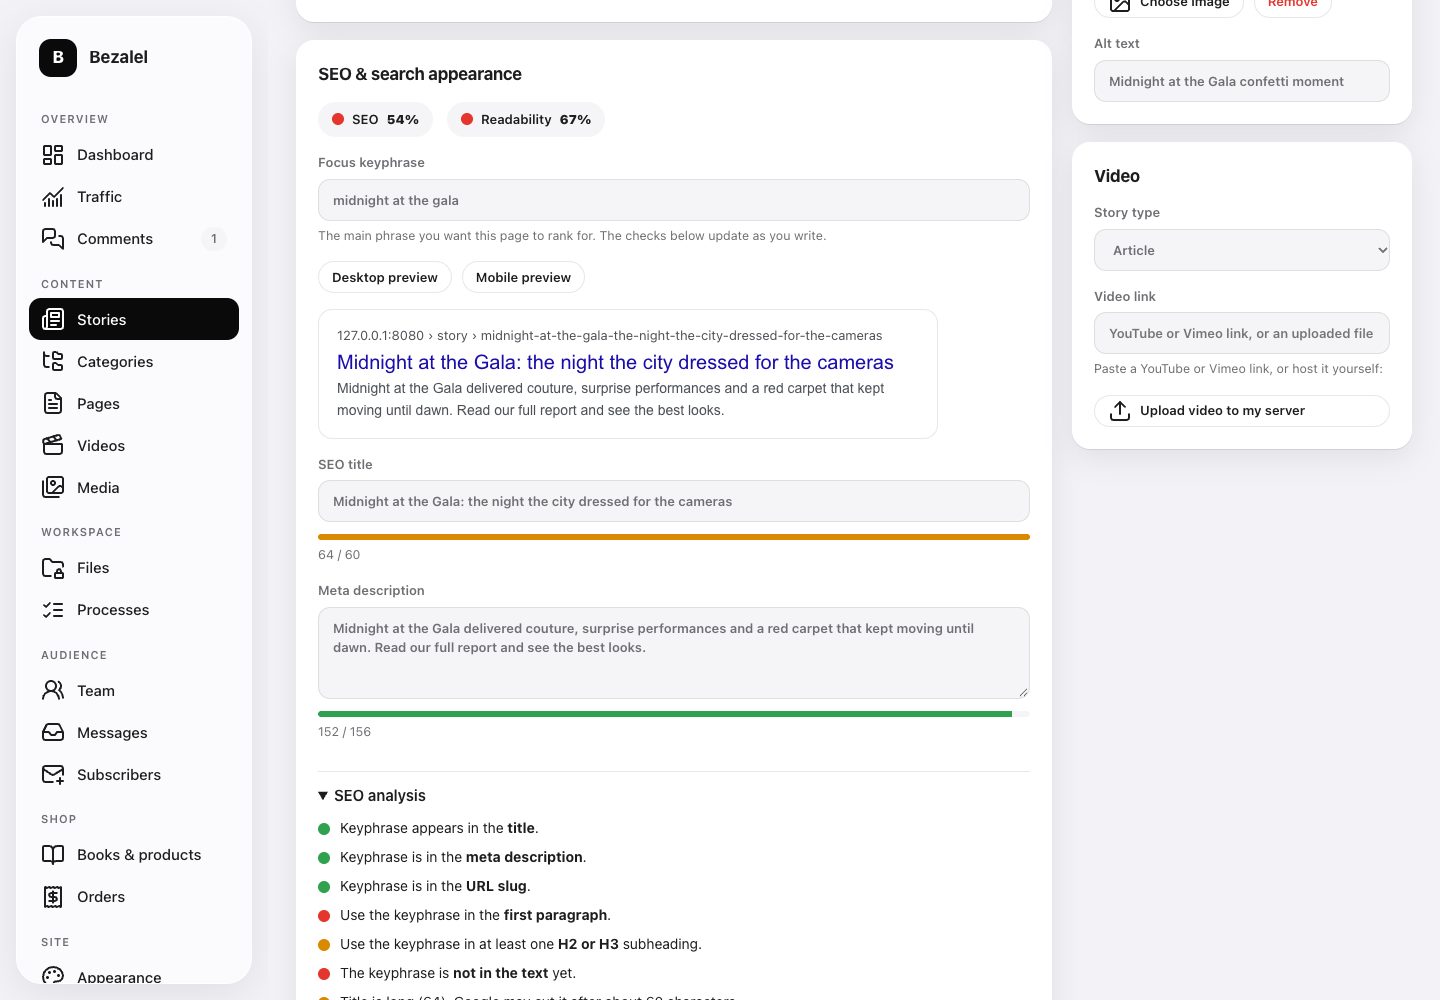
Go to Stories > New story. Write the headline, use the toolbar for headings, quotes, links, images and video, choose a category and featured image, and write a short excerpt. Type your focus keyphrase in the SEO panel and watch the SEO and readability lights turn green as you improve the text. Press Save draft to keep it private, or Publish. Choose a future date to schedule it.
Submit your sitemap (yourdomain.com/sitemap.xml) in Google Search Console, and add your verification code under Settings > SEO.
Step 11. Start selling (optional)
Open Payments. IdentifyOrg is switched on by default; paste your secret API key from your IdentifyOrg dashboard (Dashboard > API keys), press Save, then Test connection. Copy the webhook address shown on the page into the Webhooks section of your IdentifyOrg dashboard and paste the signing secret back. Use test keys first, then swap in live keys. Paystack and Flutterwave work the same way, and each card on the page lists the exact steps. Then add a product under Products (see the store section below), set a price and publish. Note that IdentifyOrg needs your site to run on HTTPS.
Step 12. Watch your traffic and talk to your readers
The dashboard shows views and visitors over 7 days, 30 days, 90 days or 12 months. Traffic opens the full report, where you can filter by country, referrer, page or keyword and export to CSV. Under Comments you approve, reply to and remove what readers say.
Try it live first
You do not need to install anything to see Bezalel in action. The live preview at bezalel.adewebstech.ng runs six complete demo sites: entertainment news, a tech blog, travel and lifestyle, a company website and both store themes. Use the Try another theme button at the bottom left to switch between them, and Admin demo to explore the dashboard. The preview is read-only and resets every day.
Build an online store
Choose Online store: fashion boutique (Atelier) or Online store: marketplace (Market) in the installer, or activate either theme later from Appearance. Every other theme can sell too: turn the shop on and it appears in the menu.
Add products
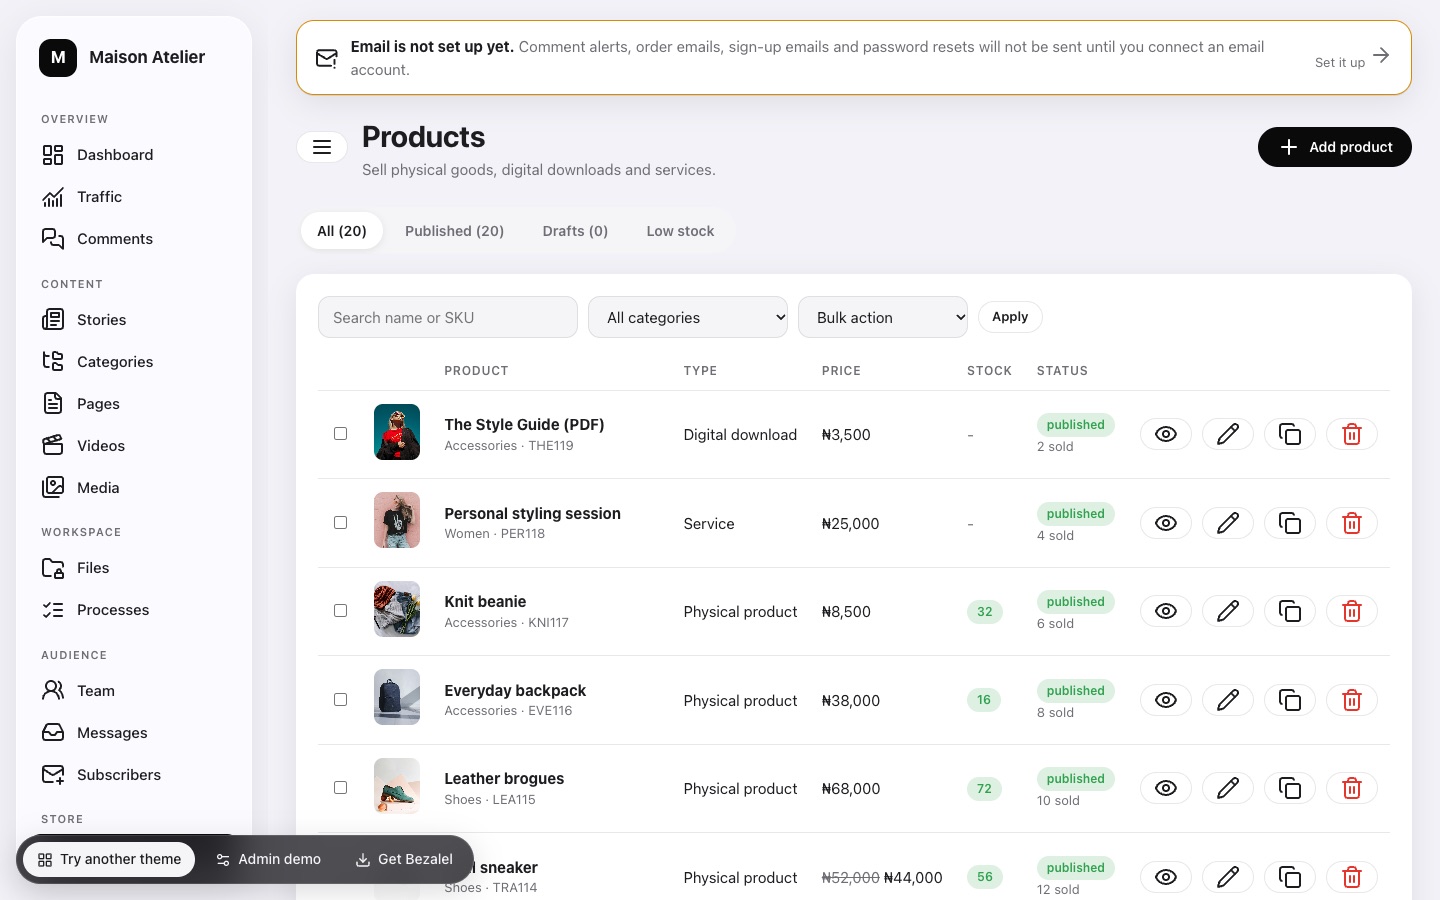
- Open Product categories and create your categories (for example Men, Women, Shoes). Categories can have a parent.
- Open Products > Add product. Choose the type: Physical (shipping and stock), Service (no shipping) or Digital download (upload a PDF or file that buyers receive after paying).
- Add the name, description, price and an optional sale price, then upload the photos. The first one is the main picture and the rest form the gallery. You can replace any image later.
- For clothing, shoes and similar items add options such as Size (S, M, L, XL) and Colour. Bezalel builds every combination as a variant with its own price, stock and SKU. Buyers must pick every option before they can add to the cart.
- Turn on Track stock to reduce stock automatically when an order is paid and show a "low stock" or "sold out" label. Cancelling an order puts the stock back.
- Press Publish. Mark a product as Featured or give it a badge such as New or Sale to place it on the home page.
Everything else a store needs
- Delivery: create delivery methods with a price, an estimated time and a free-delivery threshold.
- Coupons: percentage or fixed discounts with a minimum order, expiry date and usage limit. The demo includes WELCOME10 and FREESHIP.
- Orders: see every order, mark it paid or shipped, print a packing slip, and email the customer automatically.
- Customers: shoppers can create an account, see their orders and reset a forgotten password by email.
- Reviews: star ratings with moderation, shown on product pages and in search results.
- Payments: payments are always confirmed with the gateway on the server before anything is released or shipped.
Bring your products from WooCommerce
Open Import from WordPress > WooCommerce products (.csv). In WooCommerce go to Products > Export, tick Export all columns, and upload the CSV here. Names, descriptions, prices, sale prices, stock, SKUs, categories, images and size or colour variations come across. Images are downloaded into your media library in small batches.
Move your WordPress site to Bezalel
Bezalel can take over an existing WordPress site and keep your content, your images and your search rankings. Follow these steps in order.
- Install Bezalel on the new hosting or in a new folder, using the steps above. Do not point your domain at it yet. You can pick the Blank starter so no sample content gets in the way.
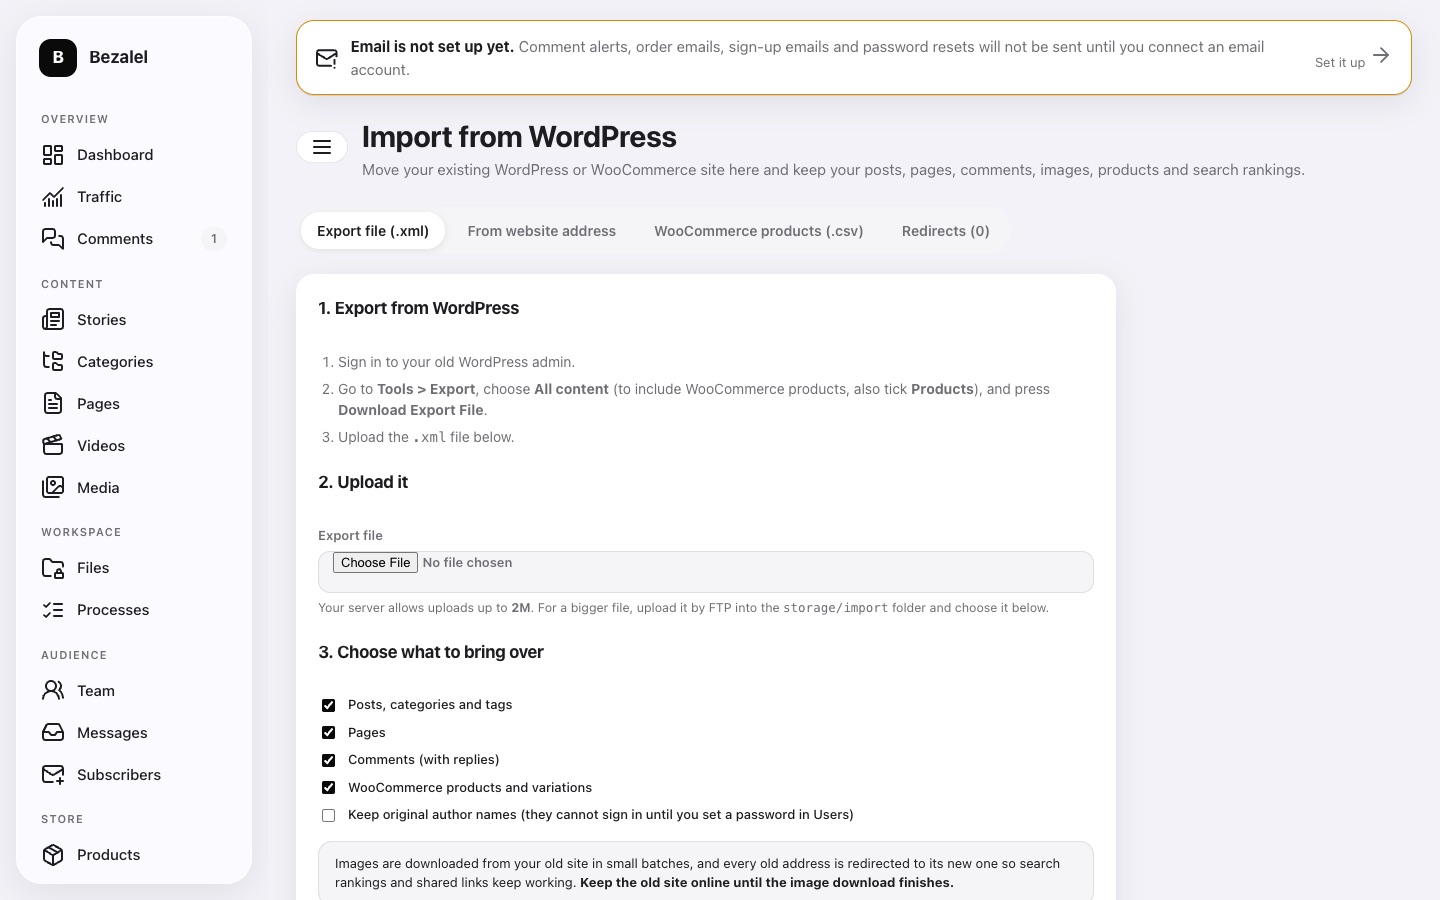
- Export from WordPress. Sign in to the old site and go to Tools > Export. Choose All content and press Download Export File. You get a
.xmlfile. If you also sell with WooCommerce, tick Products too. - Import into Bezalel. Open Import from WordPress, choose the Export file (.xml) tab, upload the file, choose what to bring over (posts, pages, categories and tags, comments and product variations) and press Import. If your host limits upload size, copy the file into the
storage/importfolder by FTP and choose it from the list. No export file? Use the From website address tab and type your old site's address: Bezalel reads its public data directly. - Let the images download. Images are fetched from the old site into your media library in small batches. Keep the old site online until the image counter finishes.
- Check your content. Look through Stories, Pages and Comments. Threaded replies, featured images, YouTube embeds and the SEO title and description from Yoast or Rank Math are kept. Unsafe code in old posts is removed automatically.
- Keep your rankings. Every old address is saved as a permanent (301) redirect to its new home, so visitors and Google follow the link to the right page. You can review, add or delete redirects in the Redirects tab.
- Switch over. When you are happy, point your domain to the new hosting. Tell Google by submitting
yourdomain.com/sitemap.xmlin Search Console.
Users and passwords are not copied for security. Add your team under Users and ask them to sign in with the new passwords.
Ads, analytics and other tools
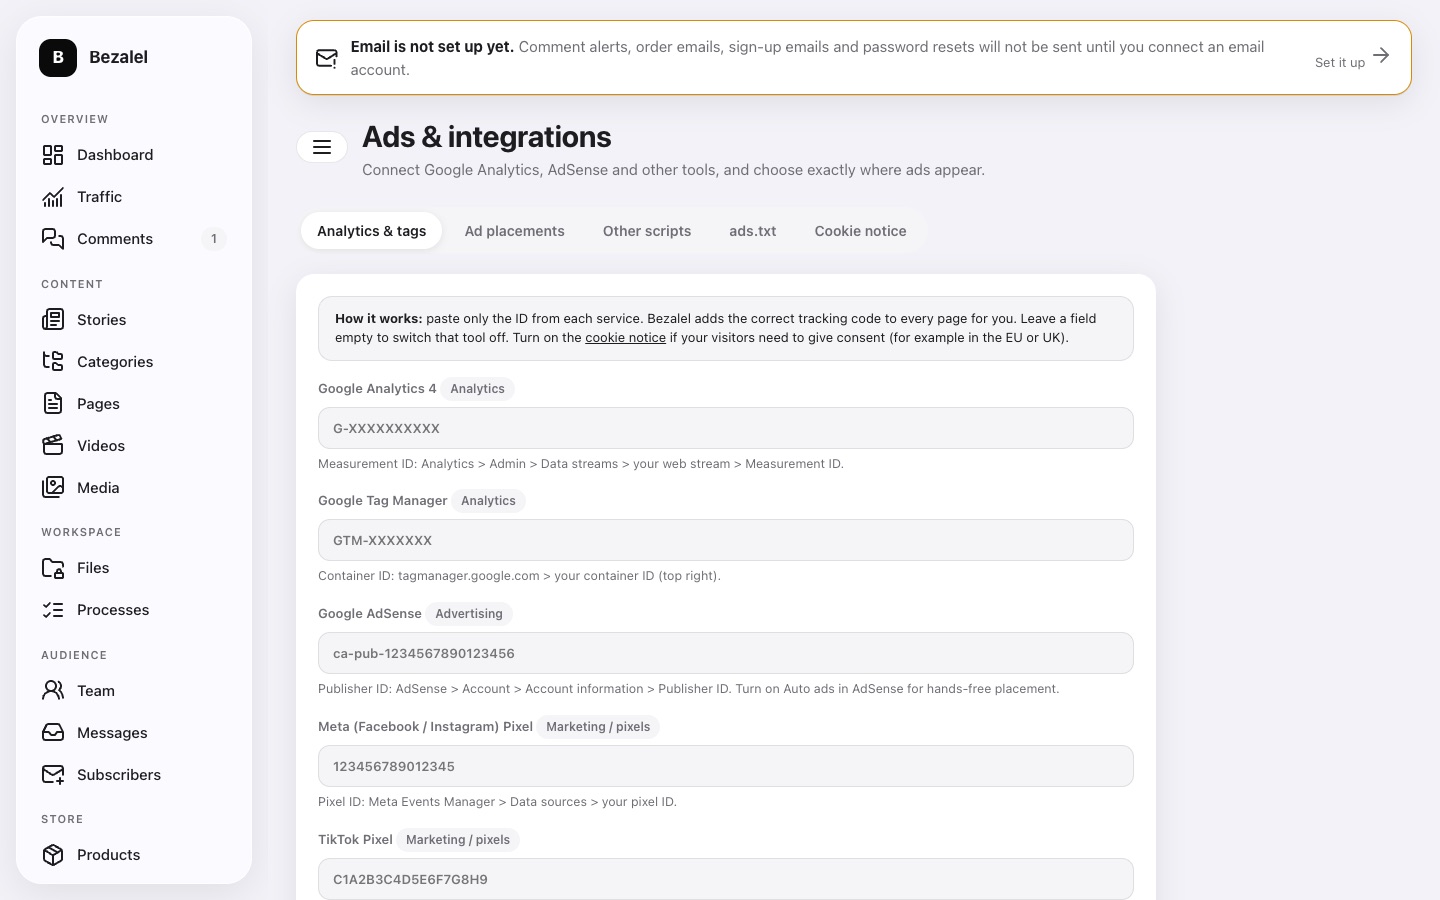
Open Ads & integrations. Paste only the ID from each service and Bezalel places the correct code on every page:
- Google Analytics 4: paste the Measurement ID (starts with
G-) from Analytics > Admin > Data streams. - Google Tag Manager, Meta (Facebook and Instagram) pixel, TikTok pixel, Microsoft Clarity, Hotjar, Pinterest, LinkedIn Insight and Bing verification work the same way.
- Google AdSense: paste your publisher ID (
ca-pub-...). Bezalel serves the correctads.txtfor you, and you can place ad units at the top, inside stories, above the footer or as a sticky banner. - Any other network (Media.net, Ezoic, Taboola, affiliate scripts, chat widgets): use Other scripts to paste the code and choose where it loads. Add as many as you like.
- Cookie notice: turn it on to load tracking only after a visitor agrees, which you need for visitors in the EU and UK.
Set up email notifications
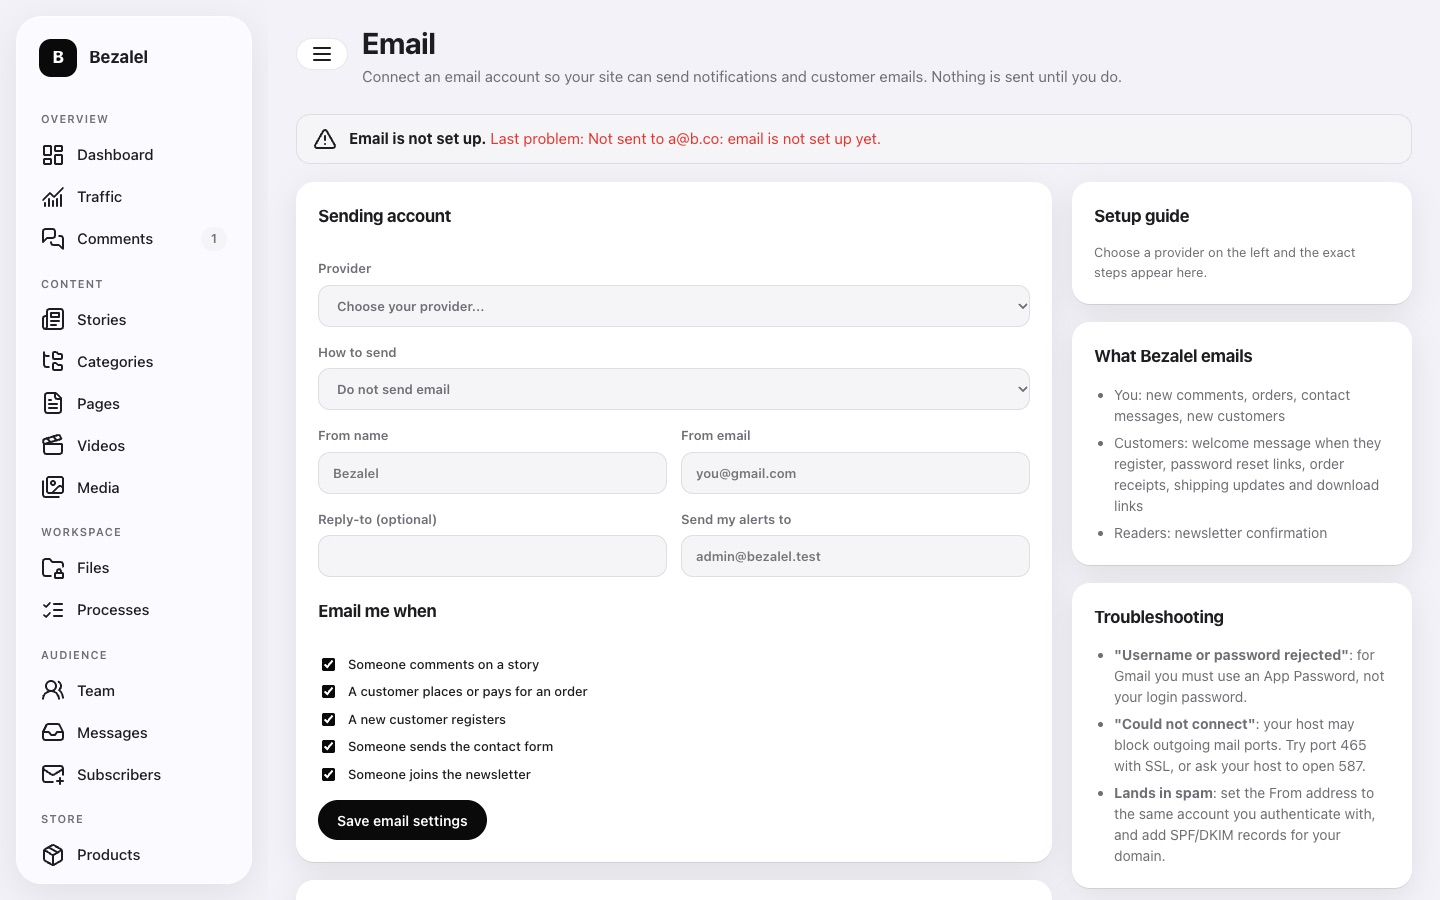
Bezalel sends no email until you connect your own account, so nothing leaves your site without your say. Until you do, the dashboard shows a reminder. To connect:
- Open Email and choose Gmail (or your host's SMTP, Outlook, Zoho, Brevo, Mailgun and more; the page fills in the right server details).
- For Gmail, switch on 2-Step Verification in your Google account, then create an App password (Google Account > Security > App passwords). Paste that 16-character password here, not your normal one.
- Press Save, then Send test email. If it fails the page tells you why and what to change.
- Choose what you want to be told about: new comments, new orders, new customers, contact messages, new subscribers and blocked attackers. Customers also receive order confirmations and password-reset emails.
Updates, without the stress
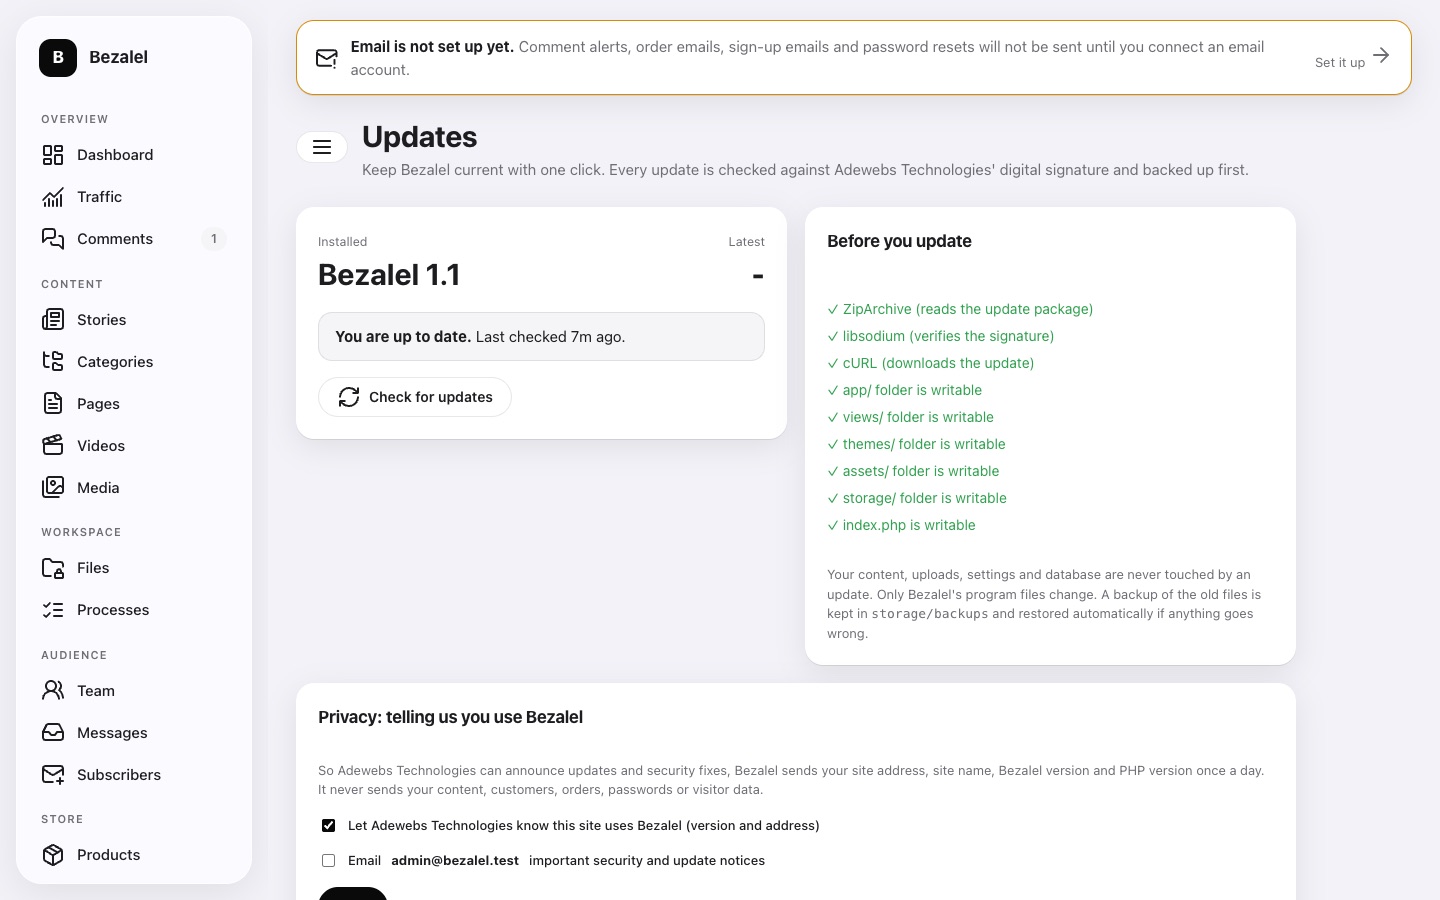
Open Updates and press Check for updates (Bezalel also checks by itself once a day). When a new version is available, press Update now. Bezalel downloads it, verifies its checksum and Adewebs Technologies' digital signature, backs up your files, shows a short "updating" page to visitors, installs it, and restores the backup automatically if anything fails. Your content, uploads and settings are never touched.
Privacy: the check sends only your site address, site name, Bezalel version, PHP version, theme and a random install ID, never your visitors, customers or content. If you tick the optional box at install, we can also email you about important security updates. You can switch the check off in config.php.
Security built in
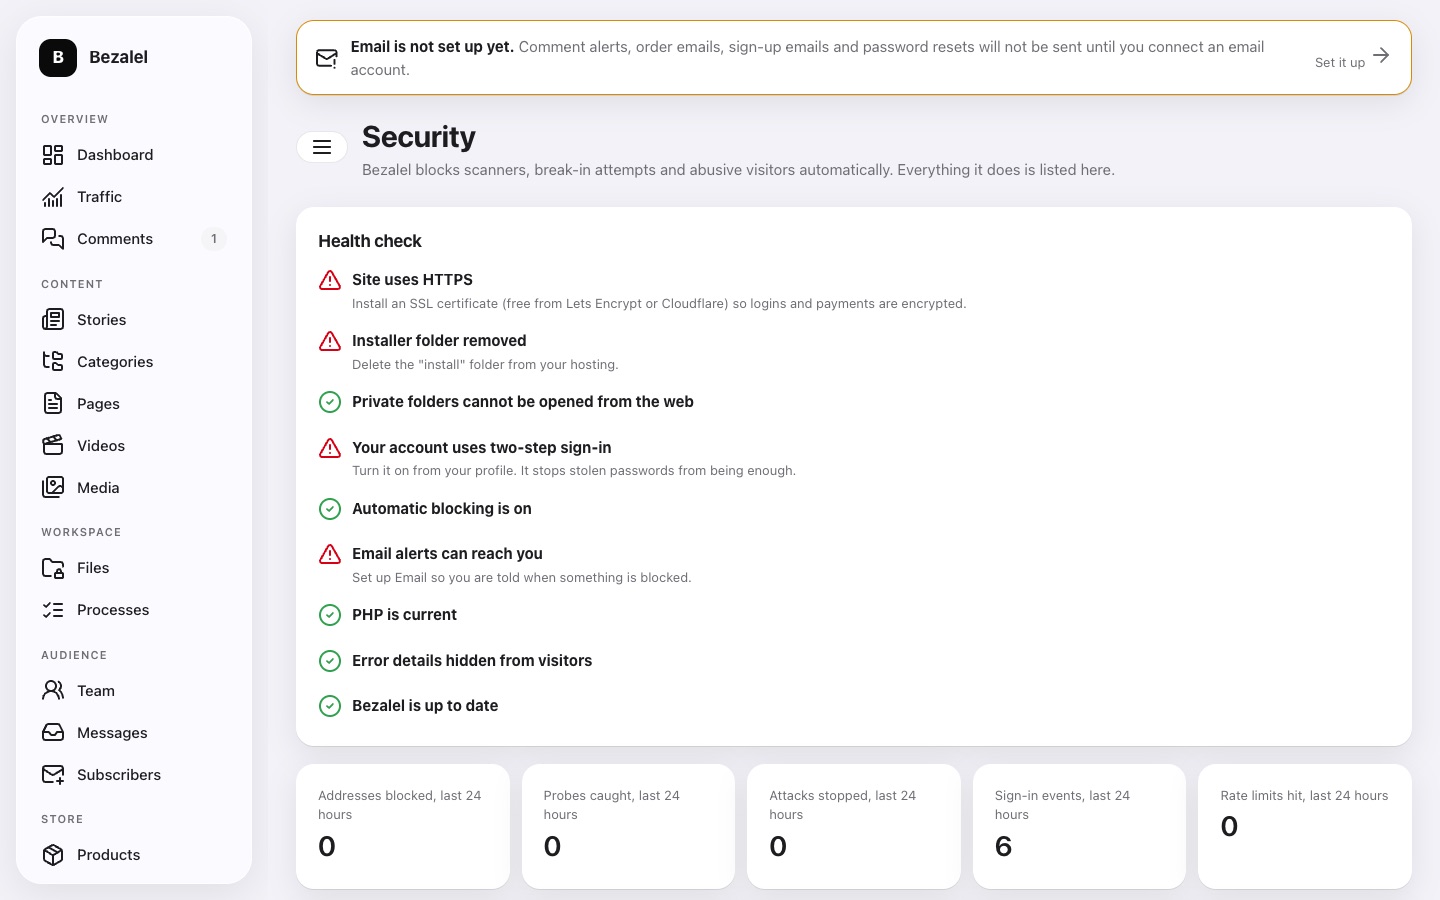
- Attackers are blocked automatically. Scanners looking for
wp-login.php,.env,.gitor phpMyAdmin, SQL-injection and traversal attempts, known hacking tools and visitors who trigger dozens of missing pages are shut out. You see every action in Security and can unblock or add addresses yourself. - Brute-force protection. Sign-in is limited per address and per account, so one account cannot be guessed from many places. Comments, likes, contact, checkout, reviews and downloads are rate-limited too.
- Two-step sign-in. Open Your profile and choose Set up two-step sign-in. Scan or type the key in Google Authenticator, Authy or 1Password. A stolen password is then no longer enough.
- Safe sessions. Team members are signed out after two idle hours, and a session that suddenly changes browser is ended.
- Hardened by default. Security headers, safe redirects, scanned uploads, and email links built from a saved address so a forged web address cannot hijack a password reset. Errors go to a private log, never to visitors.
The Health check on the Security page tells you in plain words if anything needs attention, such as HTTPS, a leftover install folder or an outdated version.
Prefer the command line?
On a server where you have SSH access you can install without the browser. Run this inside your site folder (leave out the database flags to use the automatic SQLite database):
php install/cli.php --name="My Site" --email=you@example.com --password='ChooseAStrongOne' --starter=tech
# MySQL instead (the database is created if it does not exist):
php install/cli.php --name="My Site" --email=you@example.com --password='ChooseAStrongOne' \
    --db=mysql --db-name=mysite --db-user=dbuser --db-pass=dbpass
rm -rf install
The starters are entertainment, tech, lifestyle, company, store-atelier, store-market and blank.
Troubleshooting
- "500 Internal Server Error" straight after uploading. Check the PHP version is 8.1 or higher. If your host runs Nginx instead of Apache, ask them to route all requests to
index.php(the guide in the package's README has the exact lines). - Pages other than the home page show "Not found". Apache's
mod_rewritemust be on, and the hidden.htaccessfile must have been uploaded. - The installer says a folder is not writable. Set
data,uploadsandstorageto permission 755 or 775. - Uploading a large video fails. Your host limits upload size. Raise
upload_max_filesizeandpost_max_sizein your PHP settings, or paste a YouTube or Vimeo link instead. - Emails (comment alerts, order confirmations) do not arrive. Open Email, connect Gmail or SMTP, and press Send test email. The page shows the exact reason if it fails. Also check the spam folder.
- I locked myself out after too many attempts. Wait 15 minutes, or ask your host to delete the
blocked_ipsandrate_limitstable rows in your database. Add your own address under Security > Never block these addresses once you are in. - You see a white page. Copy
config.sample.phptoconfig.php, remove the//in front of'debug' => true, reload, and read the message. Switch it off again when you are done.
Backups
Copy the data (database), uploads and storage folders and the config.php file. That is your entire site.
Need a hand, or a custom build?
If you would like us to install Bezalel for you, set up your payments, or build a custom website or software product, talk to Adewebs Technologies. We also build mobile apps, business platforms and integrations for businesses across Nigeria and beyond.